
Manual
From putting your month on the Home Screen to designing your own.
1Getting started
Put your month on the Home Screen. Start here.
Add the widget
+month shows your month in the large widget. Start by putting it on your Home Screen.
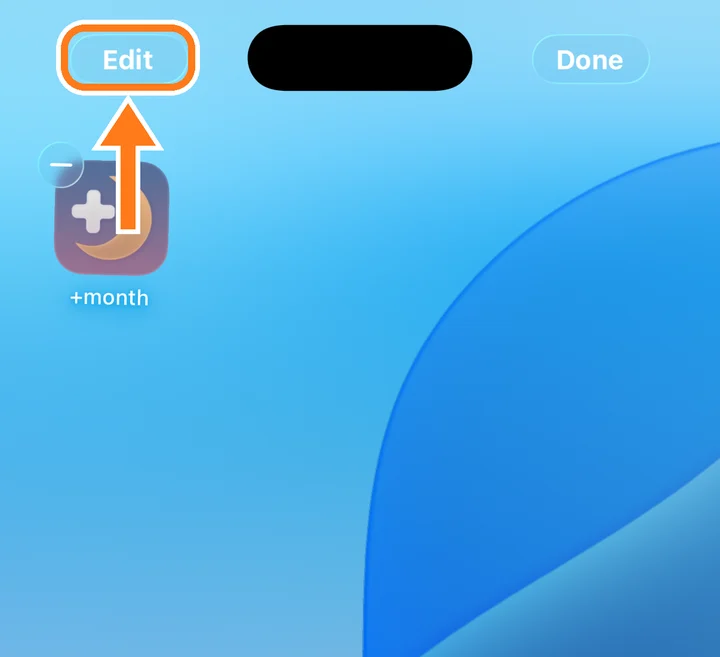
Touch and hold an empty spot on the Home Screen until the icons jiggle, then tap Edit at the top left.
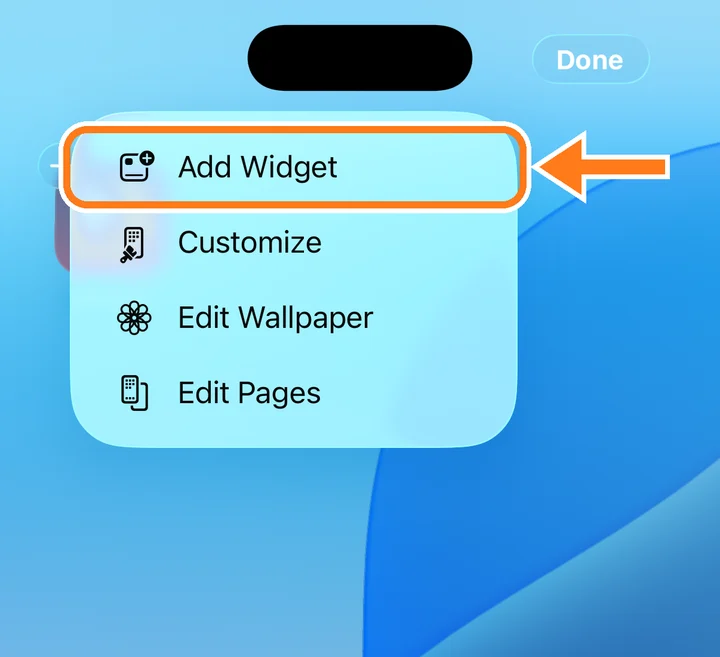
Tap Add Widget.
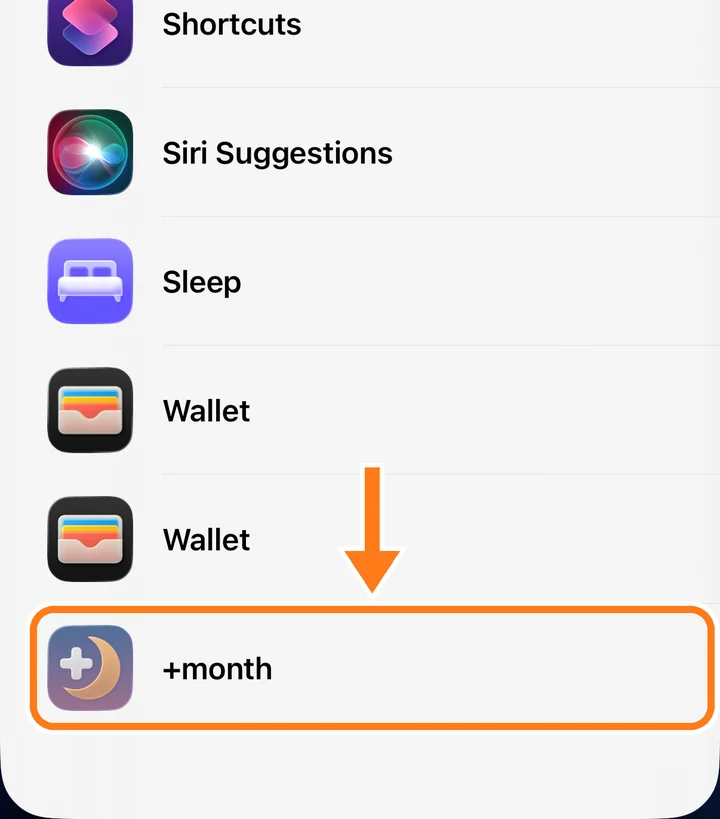
Scroll to the bottom of the list and tap +month.
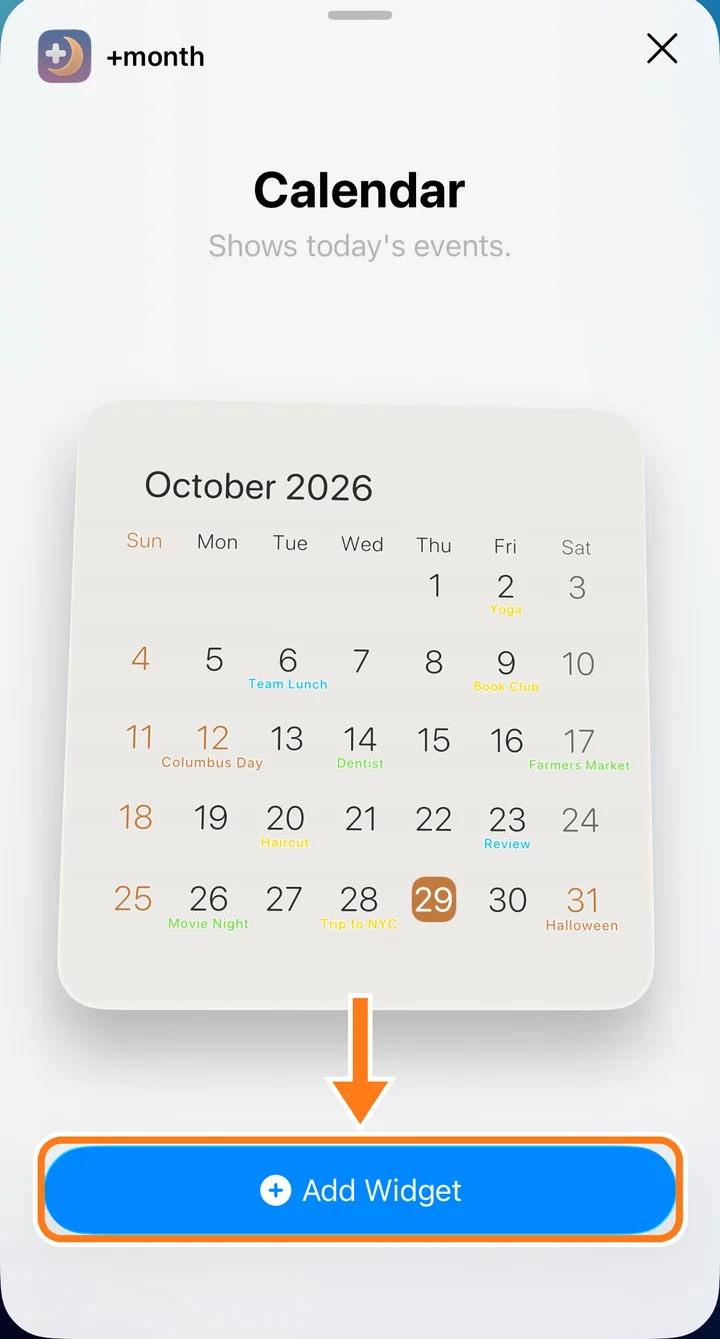
Tap Add Widget, then tap Done at the top right. Your month is now on the Home Screen.
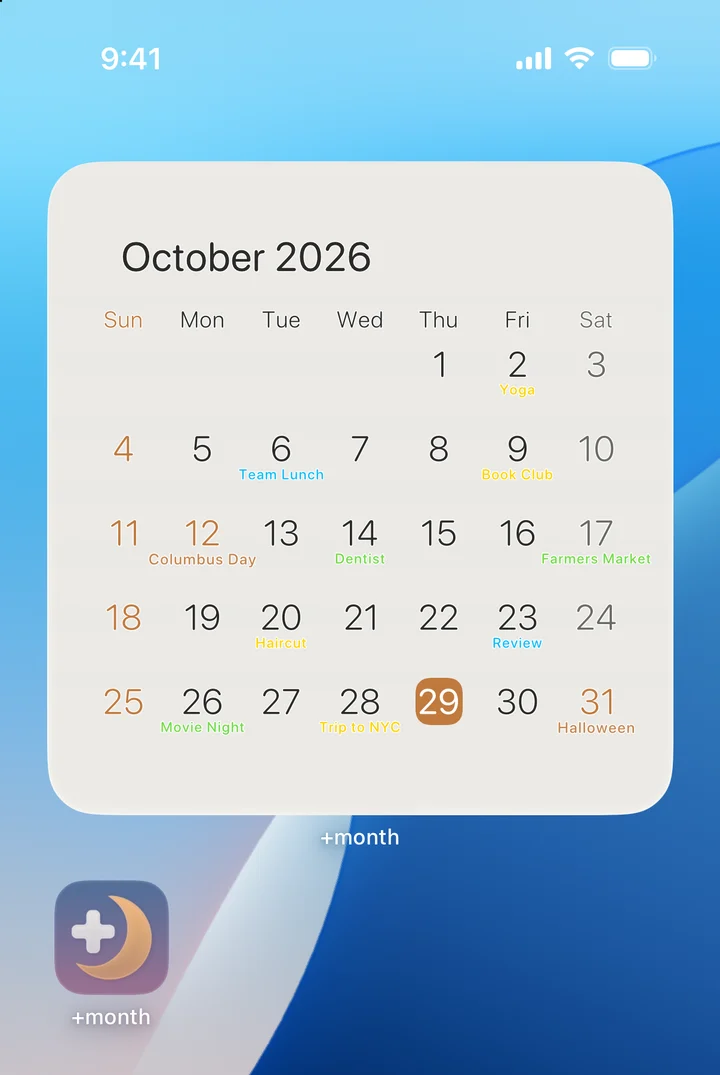
On Mac, right-click the desktop and choose Edit Widgets. Find +month and drag the large widget onto the desktop.
Allow access to your calendars
The first time you open +month, it asks for access to your Calendar and Reminders. Tap Allow Full Access and Allow, so your events and reminders appear on the widget.
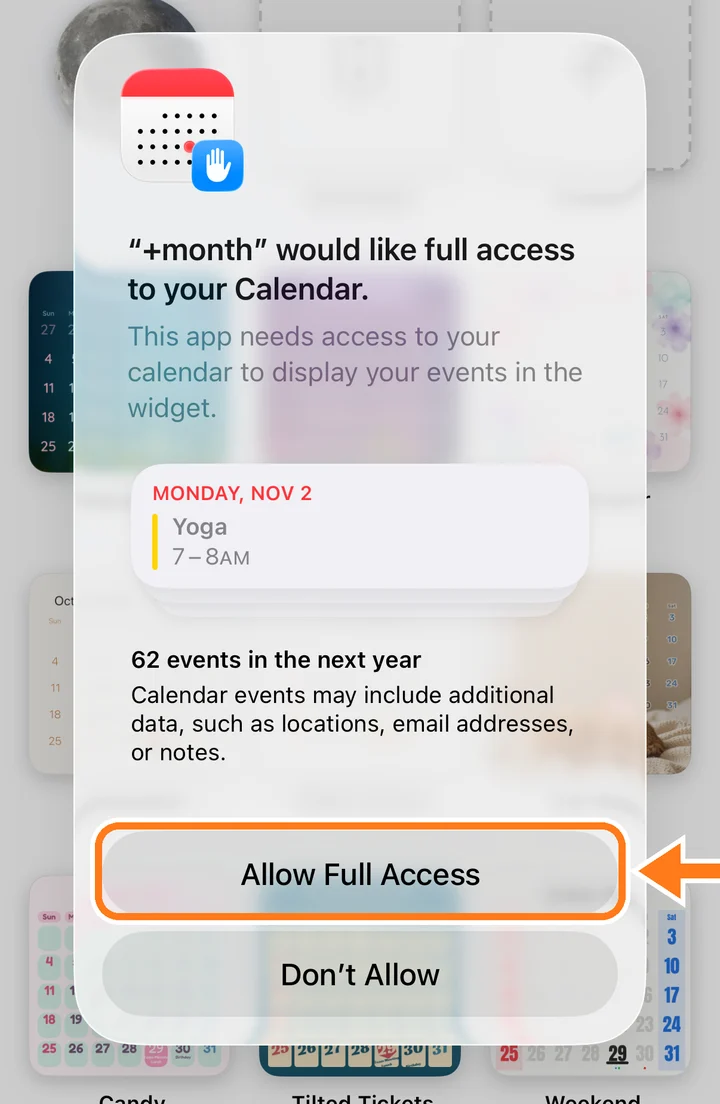
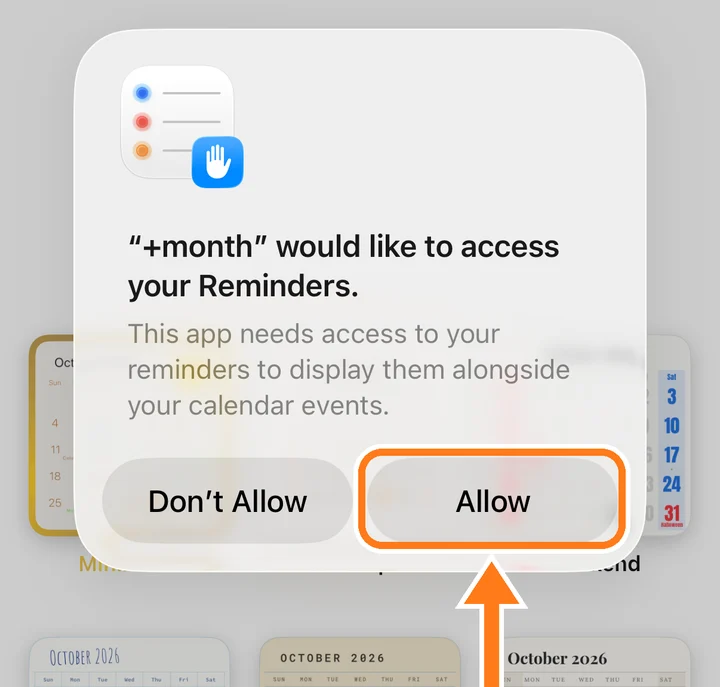
Your events stay on your device. +month only reads them; it never adds, changes or sends them anywhere.
If you tapped Don't Allow, open the Settings app, find +month, and turn on Calendars and Reminders.
Choose a calendar
Open +month and tap a calendar you like.
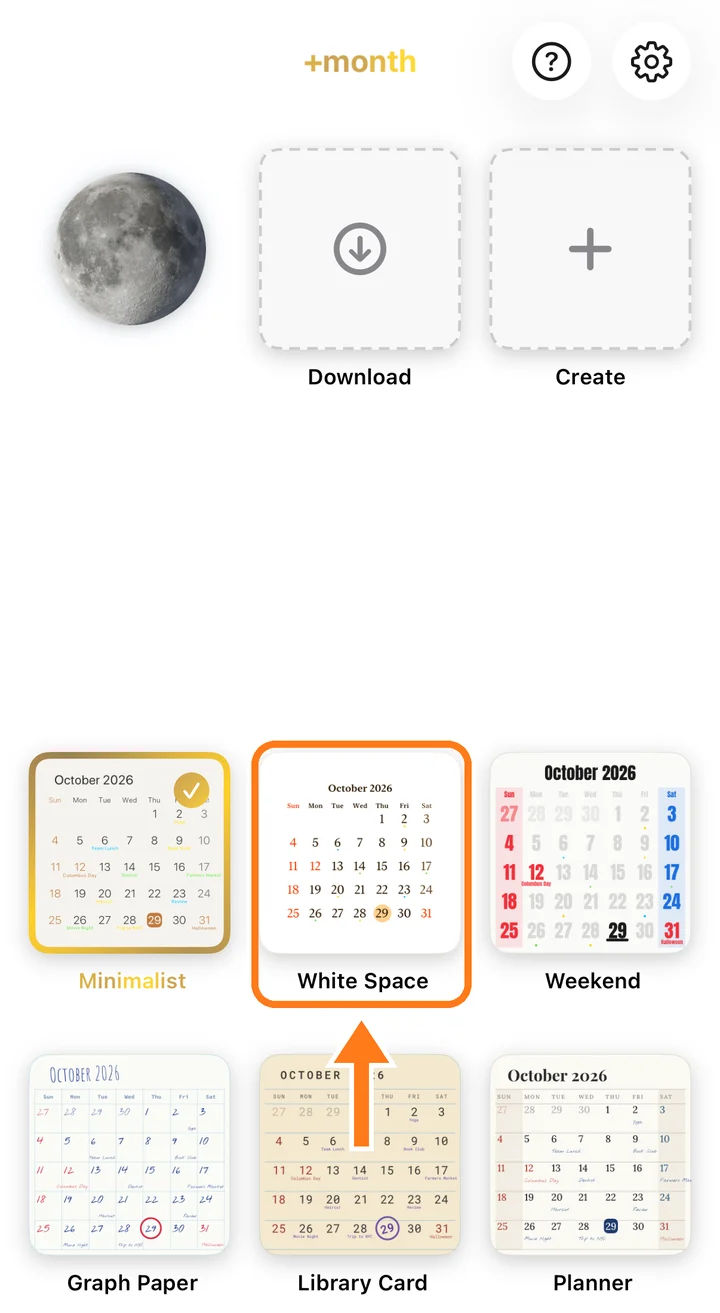
Tap Set. The widget changes to this calendar.
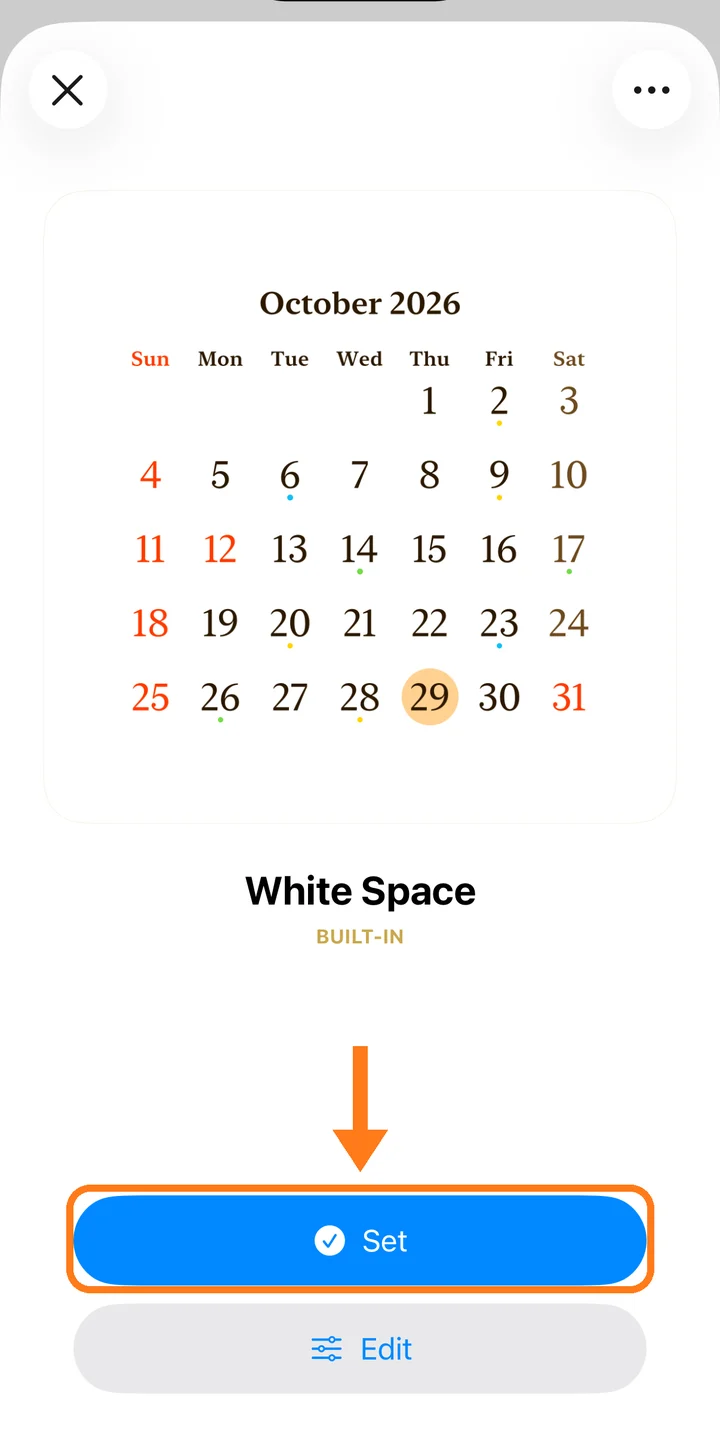
The calendar you set has a gold check mark on the home screen of the app. Swipe left and right in the detail screen to see other months.
Flip through months
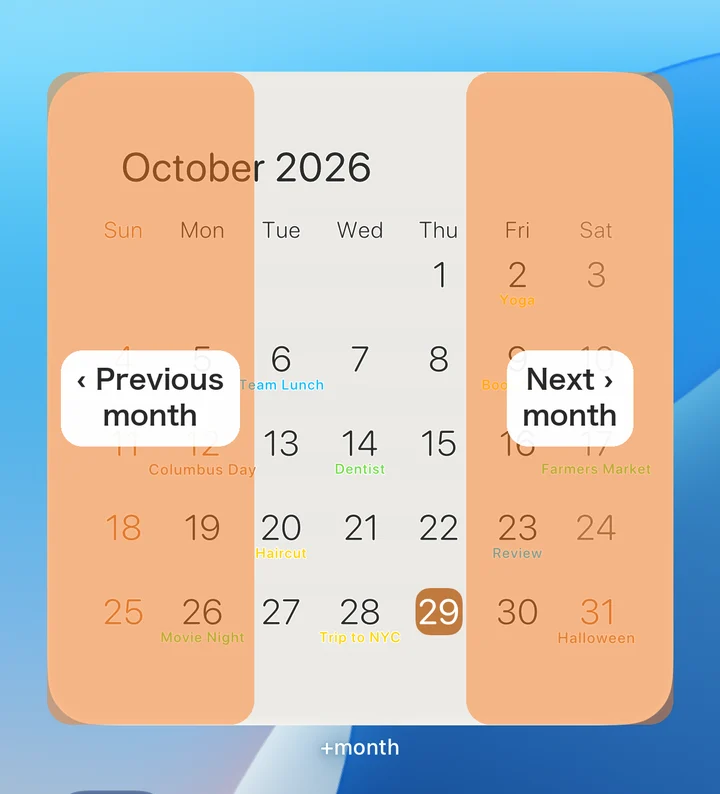
Tap the left side of the widget to see the previous month, and the right side to see the next month.
+month doesn't open, so you can check next month's plans in a second. After an hour, the widget goes back to this month.
A different calendar on each widget
If you have more than one widget, each one can show a different calendar.
Touch and hold the widget and tap Edit Widget.
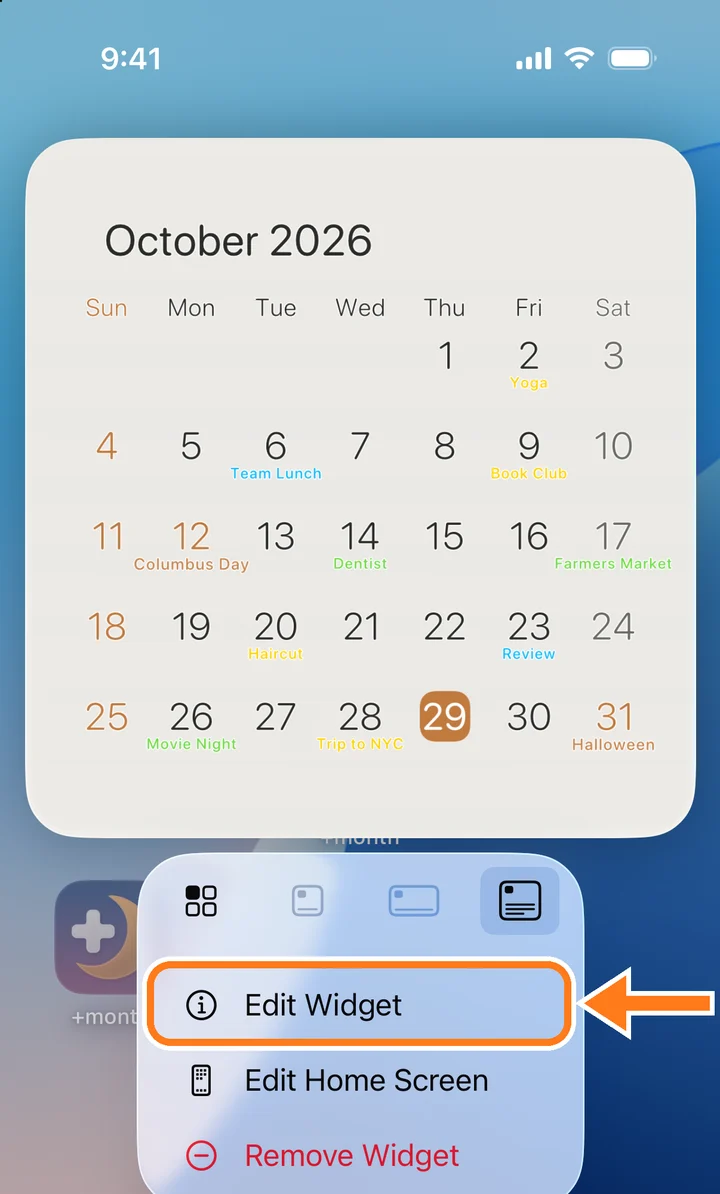
Tap Theme and choose a calendar.
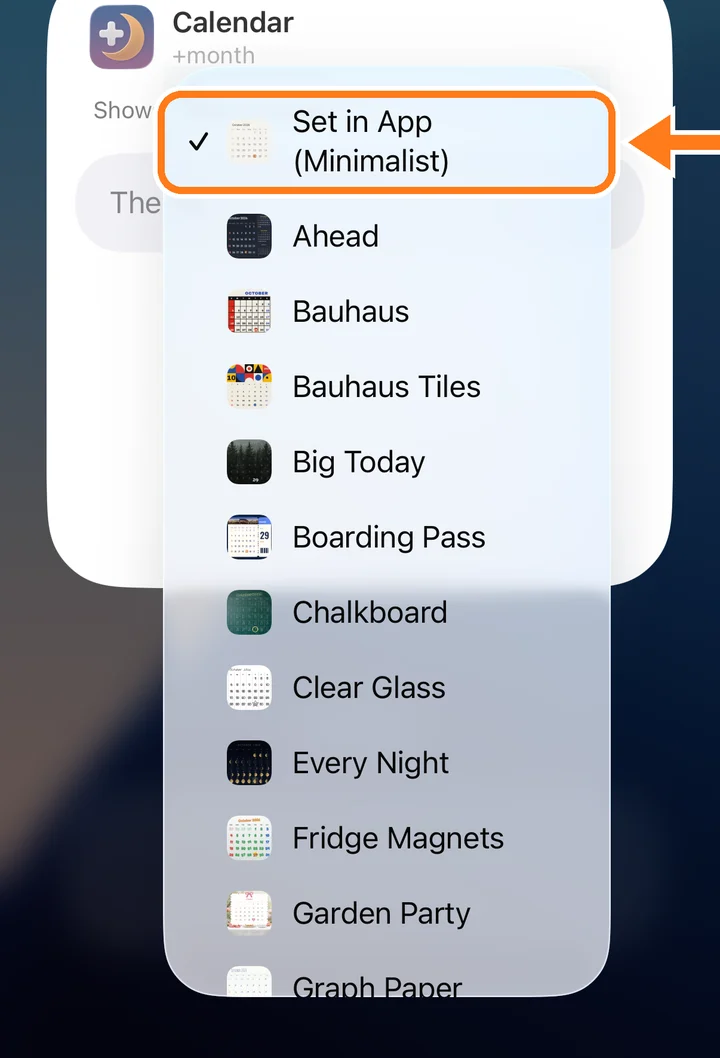
Set in App shows whichever calendar you set in +month. Choose it when you want the widget to follow the app.
Choose which calendars to show
Tap the gear at the top right of +month to open Settings. Under Calendars to Show, turn off any calendar you don't want on the widget.
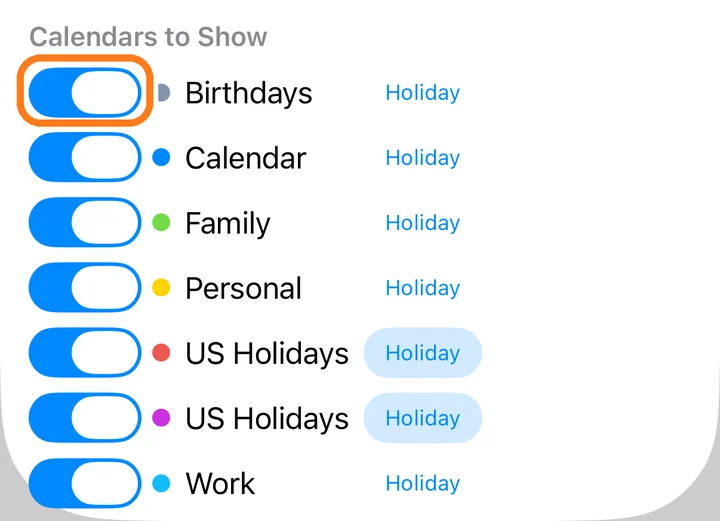
Holidays are shown in a different color. If a holiday calendar isn't recognized, tap Holiday next to it.
Country and first day of the week
In Settings, Country sets how month and weekday names are written, and Week Starts On chooses Sunday or Monday.
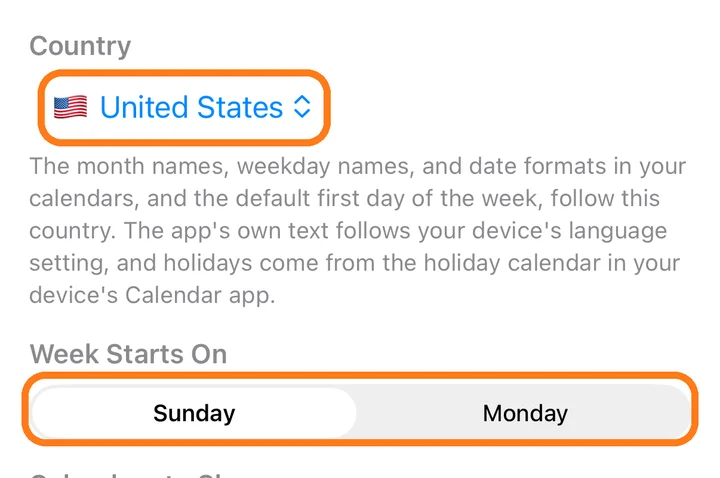
Changing Country also sets Week Starts On to that country's usual first day. You can change it again afterward.
2Everyday use
Handy things once your calendar is up.
The Moon page
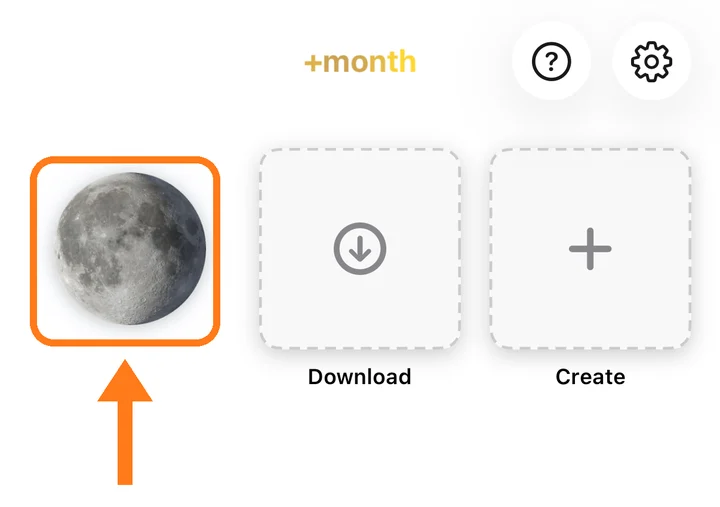
Tap the moon at the top left of +month.
You'll see tonight's moon, how much of it is lit, and how long until the next new moon and full moon. Scroll down for moonrise and moonset, tonight's numbers, this month's phases and this year's full moon names.
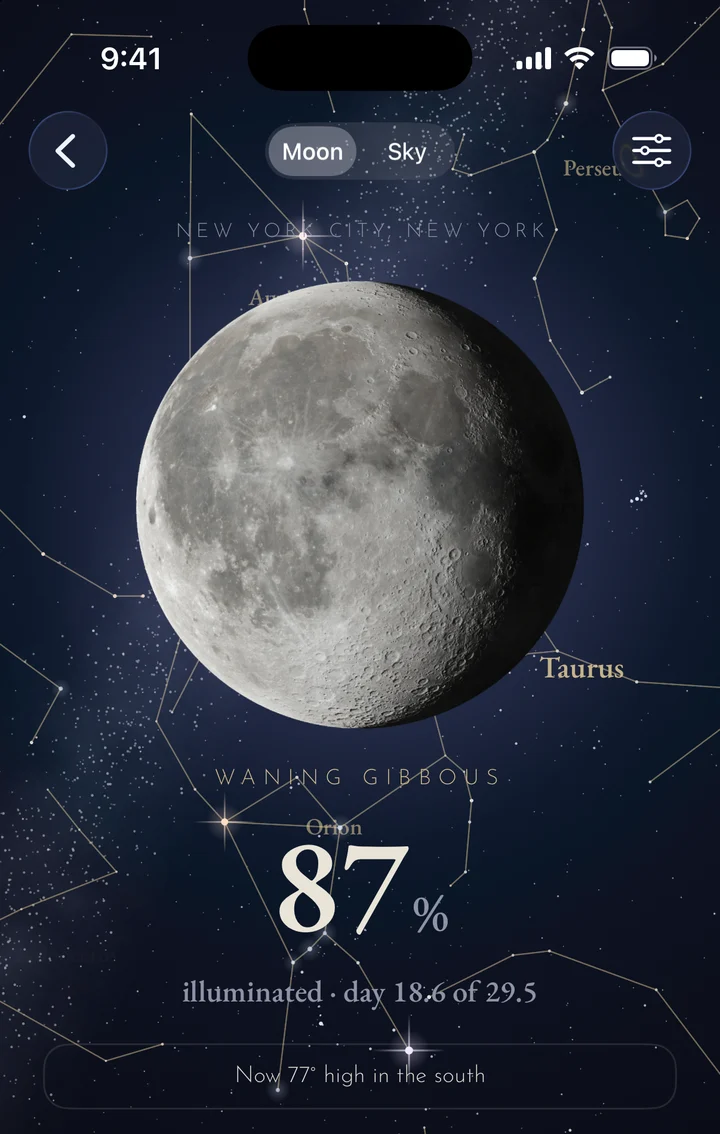
Tap Sky at the top to see the real night sky around the moon. Drag the slider to move through the night.
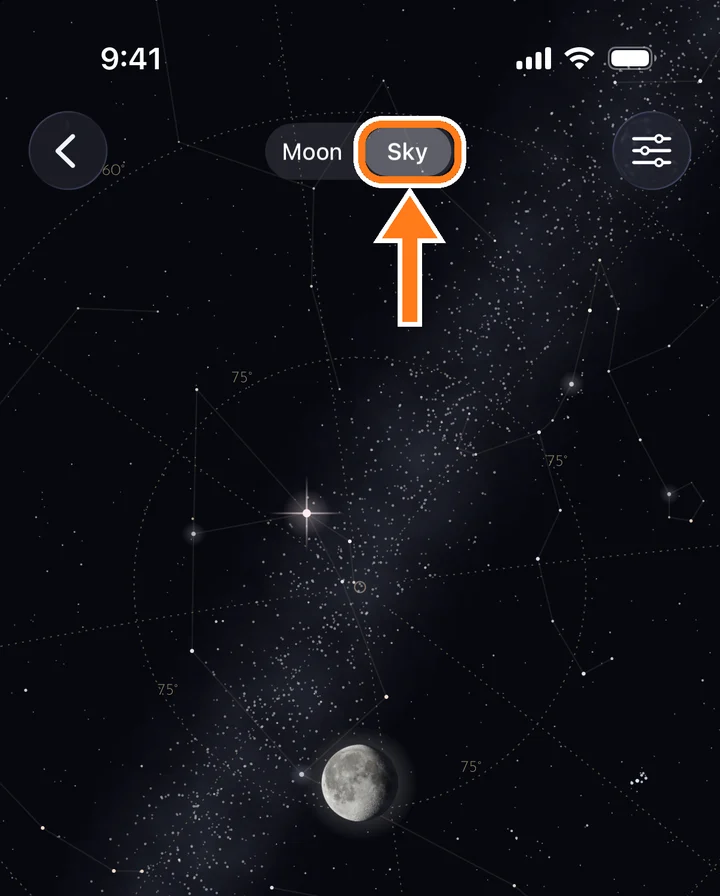
To see moonrise and moonset for where you are, tap the message under the moon and set your location. Your location stays on your device.
Show a calendar at set times
Show a different calendar only at the times you choose, such as weekday evenings or weekends. At other times, the calendar you set is shown.
Tap a calendar, tap ⋯ at the top right, and choose Show on a Schedule.
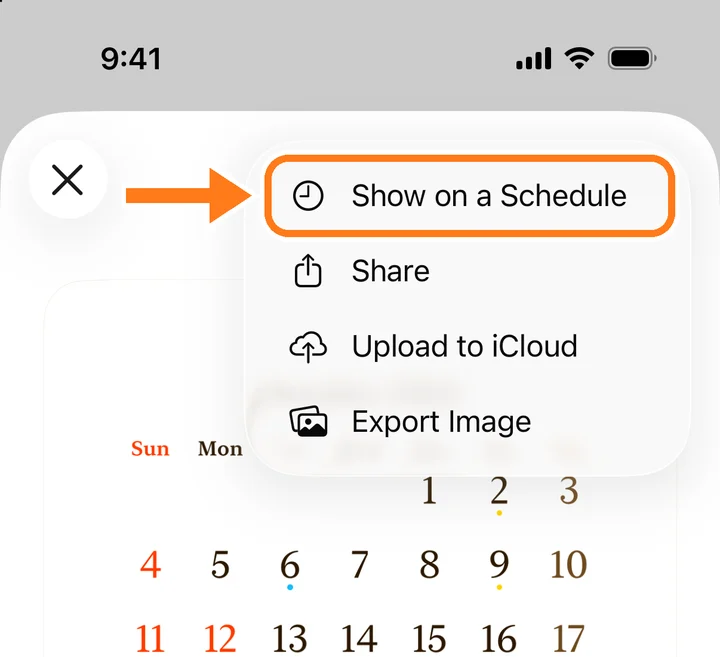
Choose the days and times, then tap ✓.
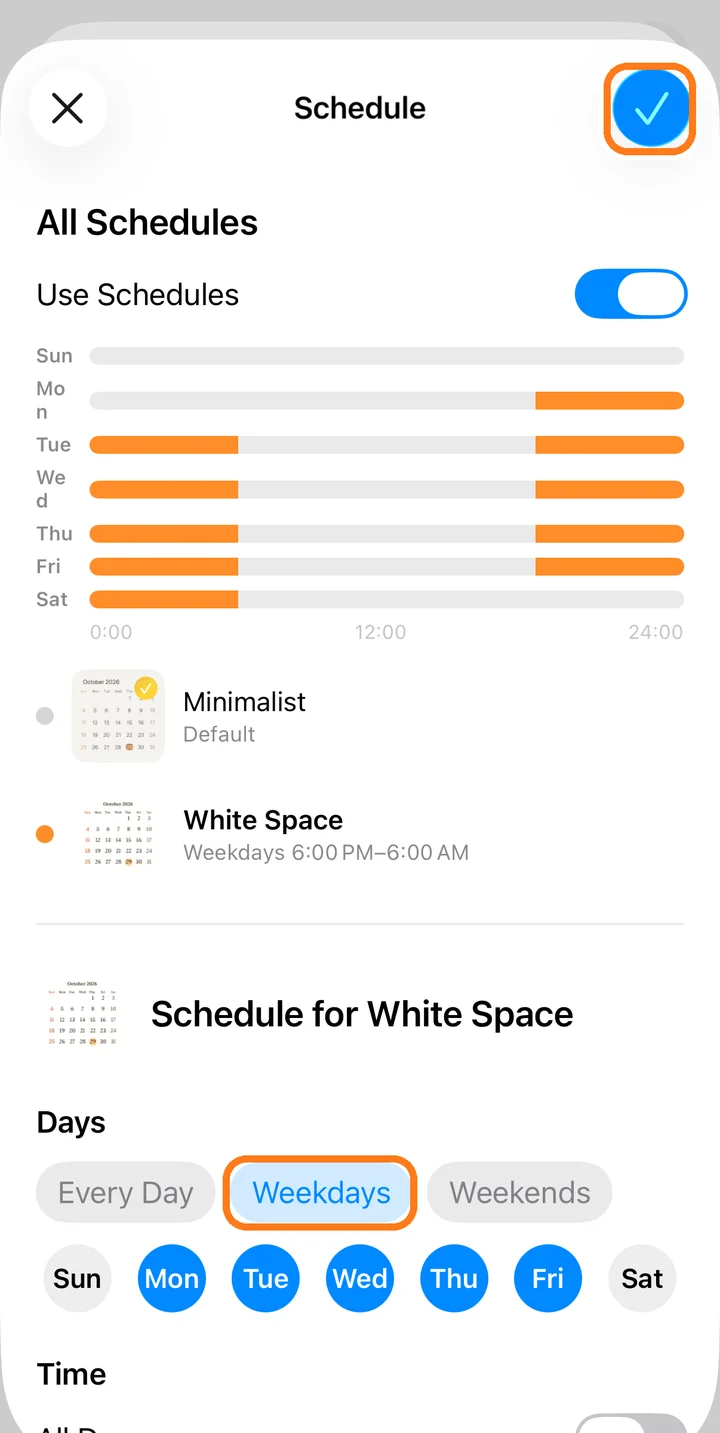
A schedule changes only widgets set to Set in App. A calendar with a schedule has a clock mark next to its name.
To pause every schedule for a while, turn off Use Schedules.
Download more calendars
New calendars are added every month.
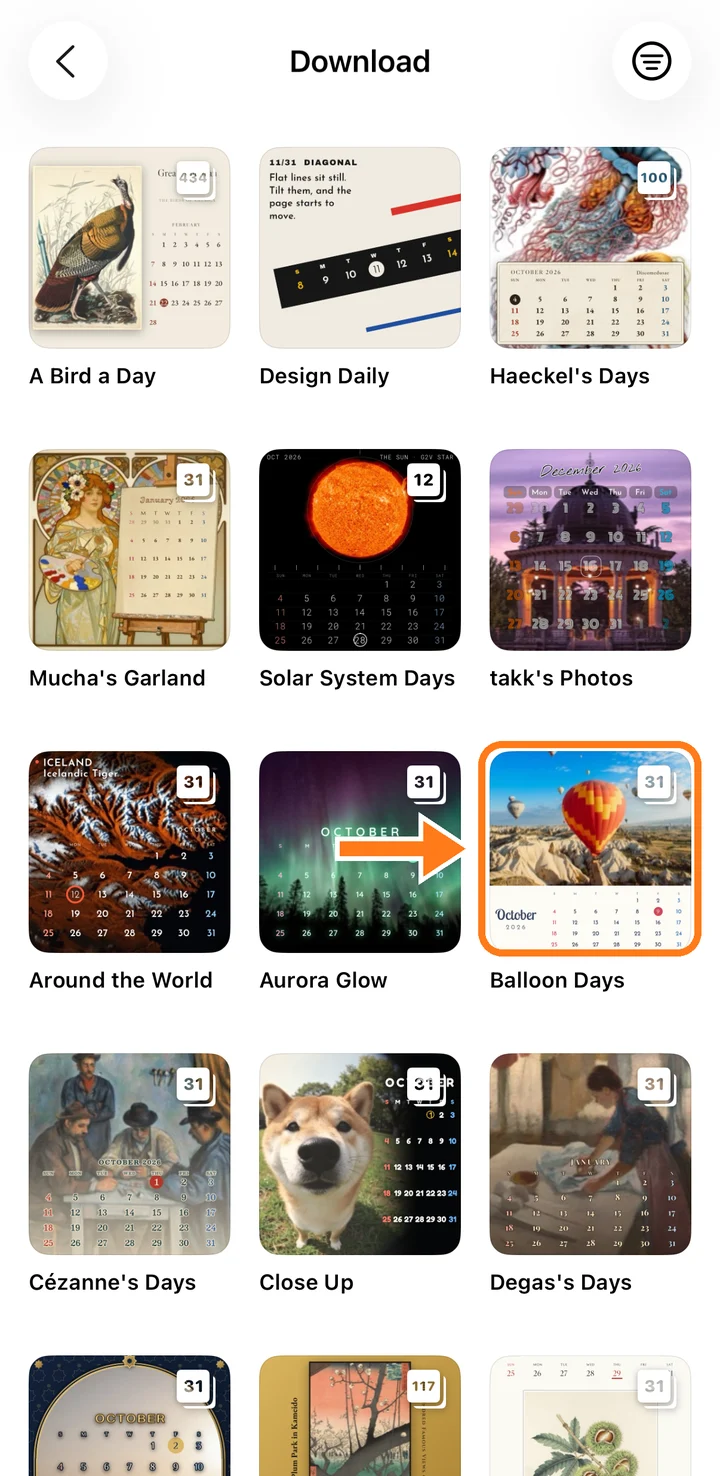
Tap Download at the top of +month.
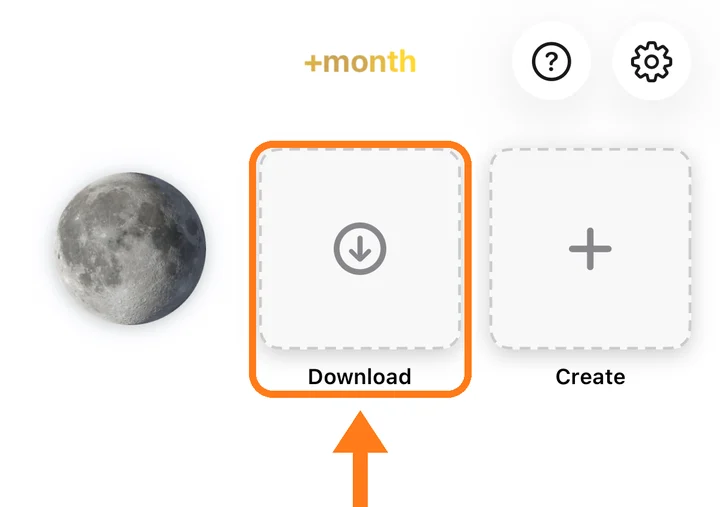
Tap a calendar to see its pictures and details. The button at the top right sorts the list by New, Updated, Name or Shuffle.
Tap Download. The calendar is added to your list, ready to Set.
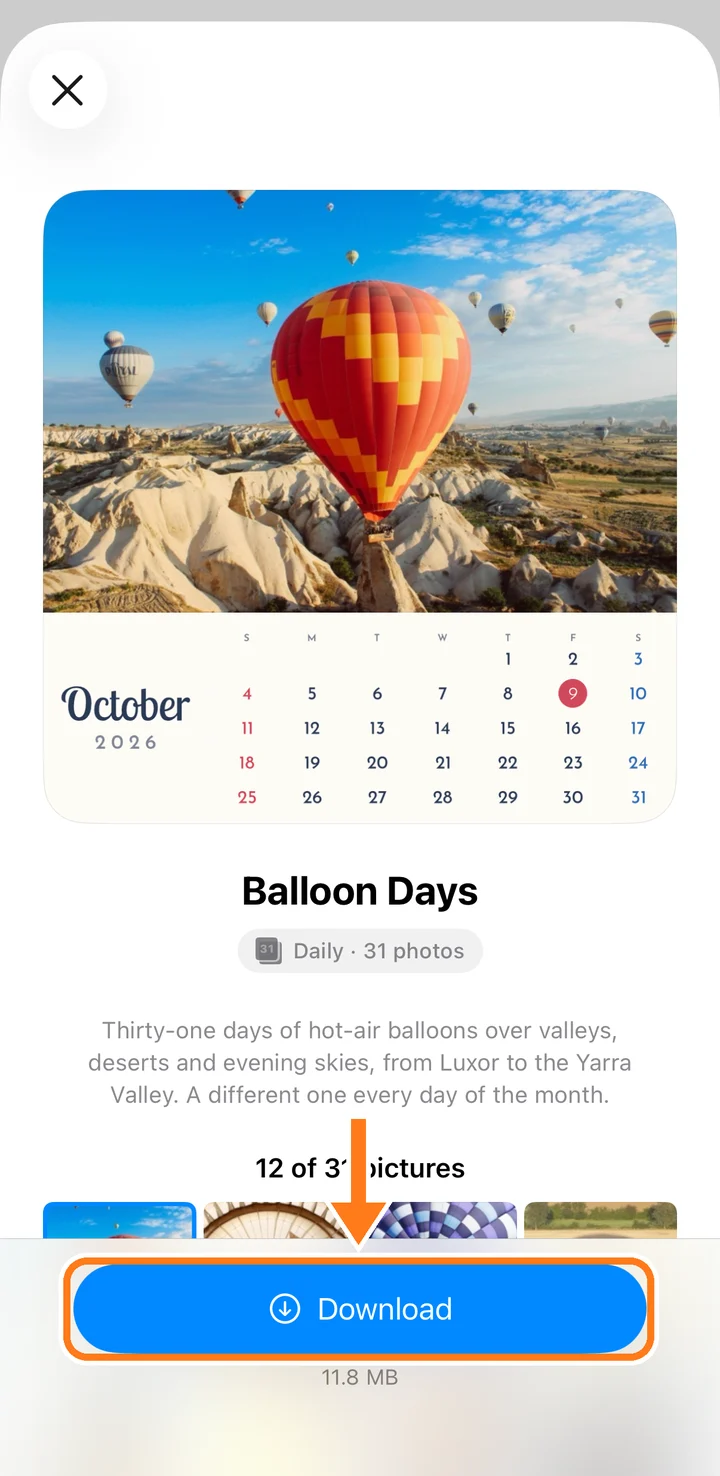
The free version lets you download 3 calendars. With +month Premium there's no limit.
What tapping the widget does
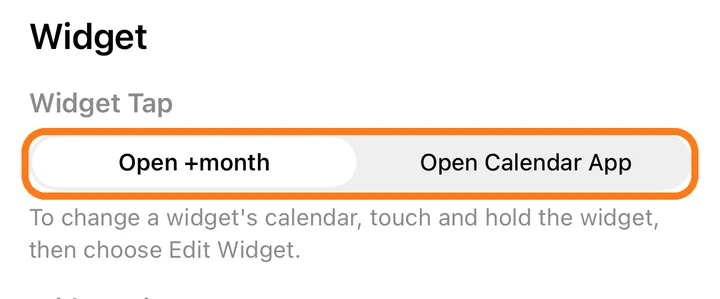
Tapping the middle of the widget opens +month. To open your Calendar app instead, go to Settings and choose Open Calendar App under Widget Tap.
Tapping the left and right sides always flips months.
3Make your own
Design your own calendar, from small tweaks to a whole new look.
The editor at a glance
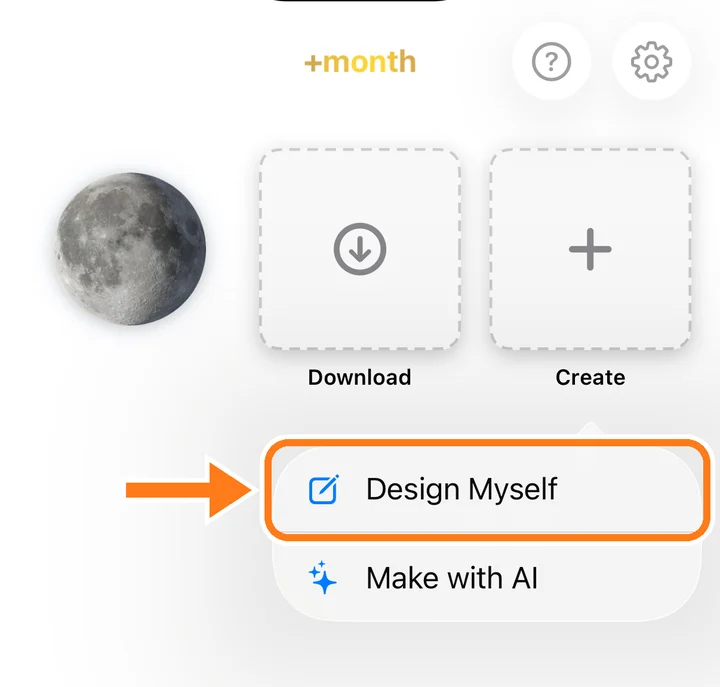
Tap Create at the top of +month and choose Design Myself. To change a calendar you already have, tap it and tap Edit.
The preview is at the top, and the settings are below. Tap a heading to open it. Your changes show in the preview right away.
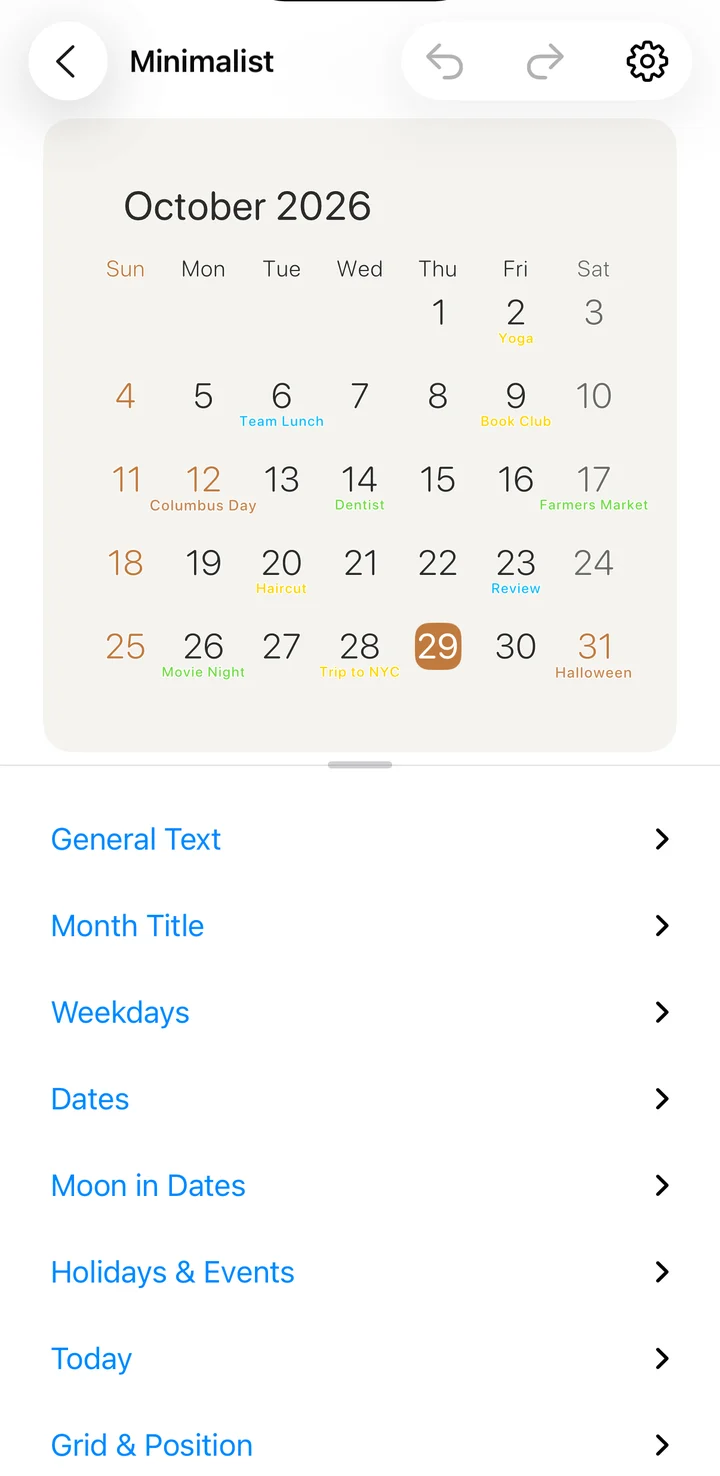
Undo and redo are at the top right. Nothing changes on your widget until you save, so feel free to try things.
Built-in calendars can't be overwritten. Tap Save as New to keep your version as a new calendar.
Month title, weekdays, dates and events
General Text, Month Title, Weekdays, Dates and Holidays & Events each have their own font, color, size, outline and shadow.
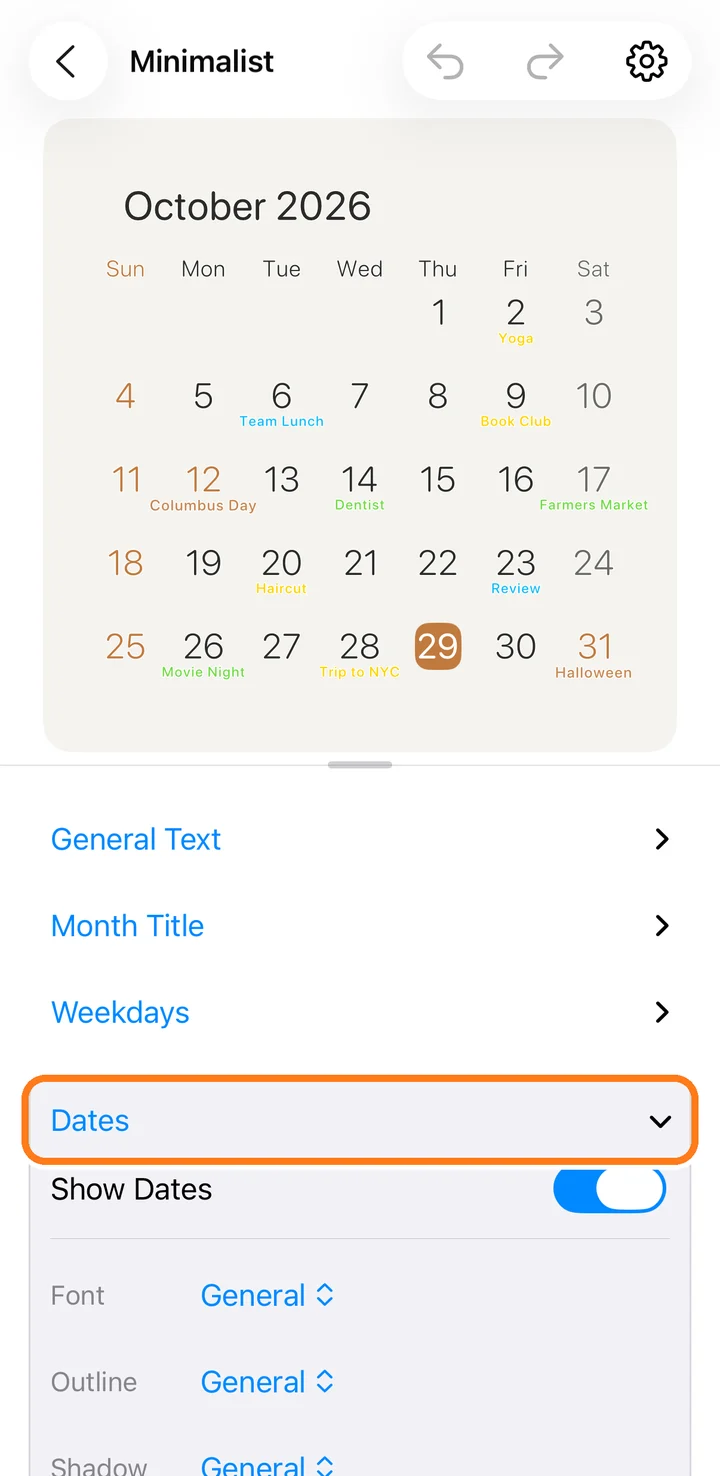
Anything left at General follows General Text, so you can change the font of the whole calendar in one place.
Grid & Position sets the lines, the cell colors and where the calendar sits.
Mark today
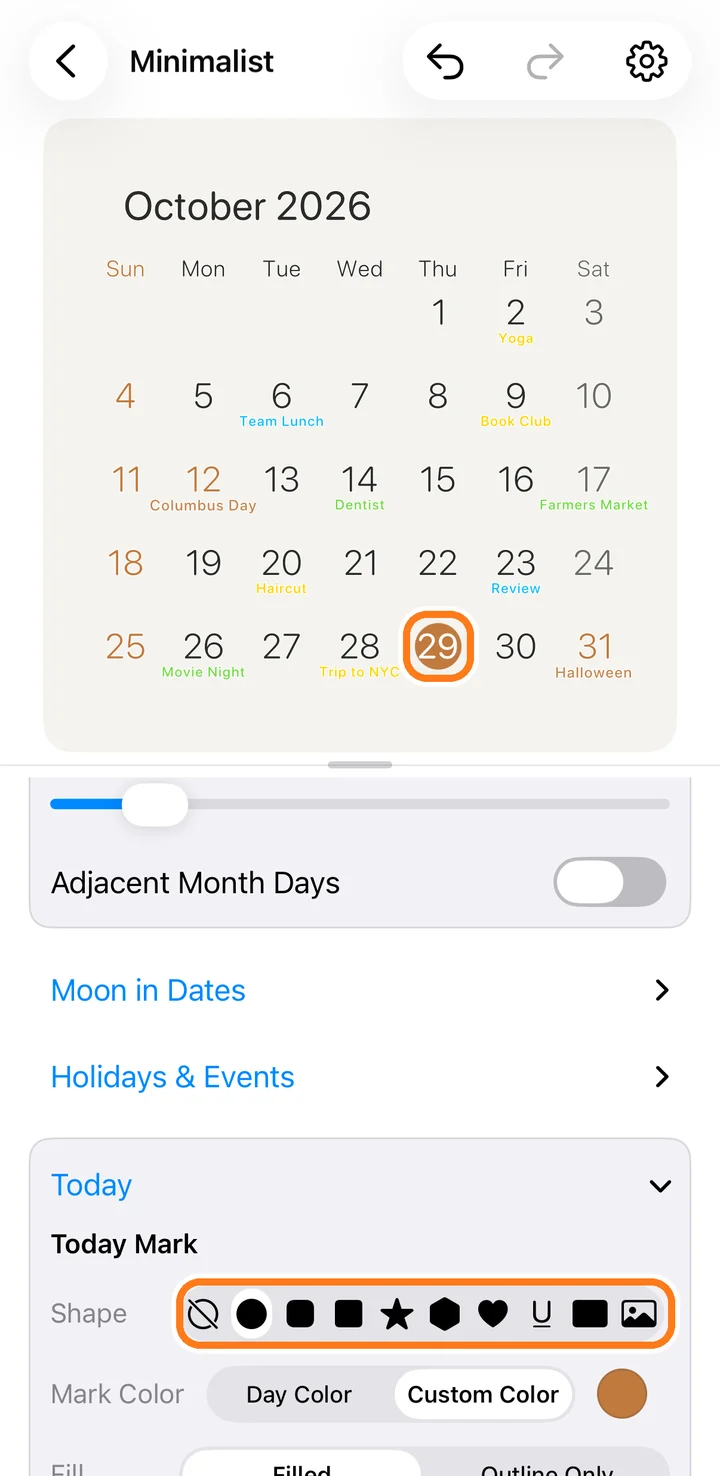
Open Today and choose a shape for Today Mark. You can also choose its color, filled or outline only, and the color and font of today's number.
The picture icon at the end lets you use your own image as the mark.
Special days
Special Days gives chosen days their own look, like birthdays, exams, days off or trash days.
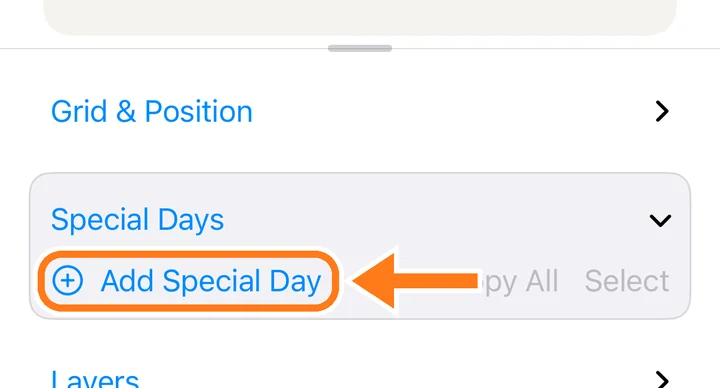
Open Special Days and tap Add Special Day.
Under Keywords, type words from your events' names, such as Birthday or Trash. Days with a matching event change. Under Dates, choose days on a calendar, or days that repeat every week or month instead.
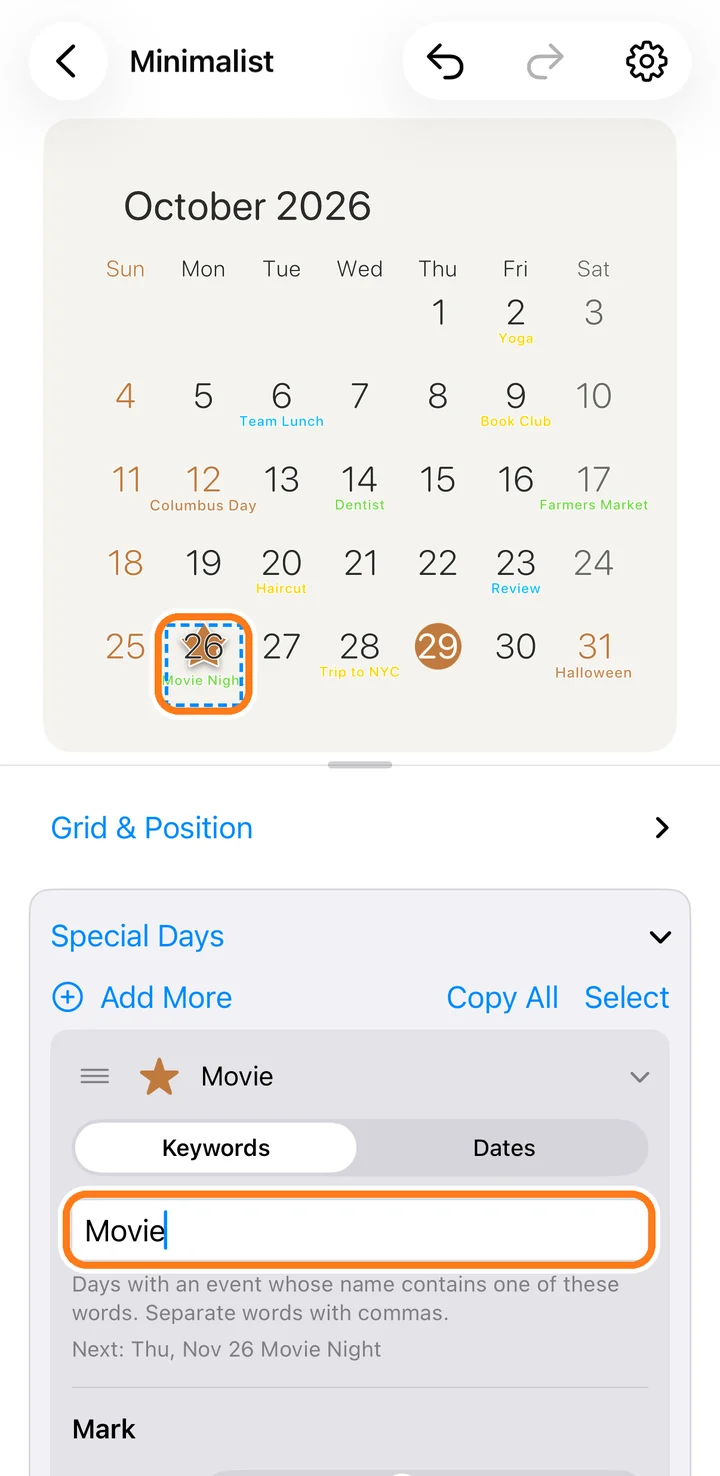
Below that, choose the mark, the number's color, the cell fill and the text. While the card is open, one day in the preview shows a sample in a dotted box.
You can add as many as you like. The higher one in the list wins when two fall on the same day.
Layers
The calendar itself is one layer. Add photos, shapes, text, clocks or another calendar, and stack them however you like.
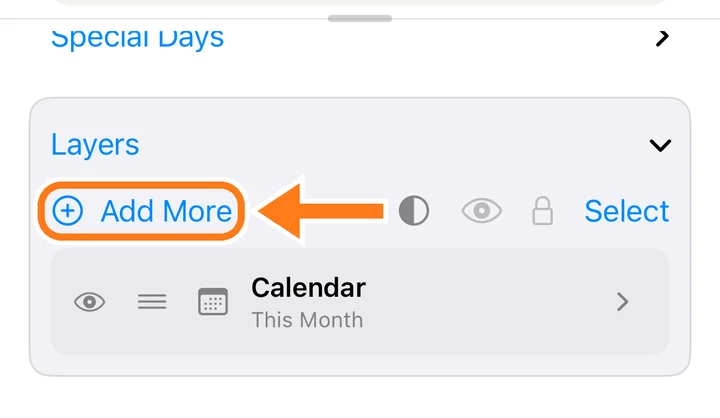
Open Layers and tap Add More.
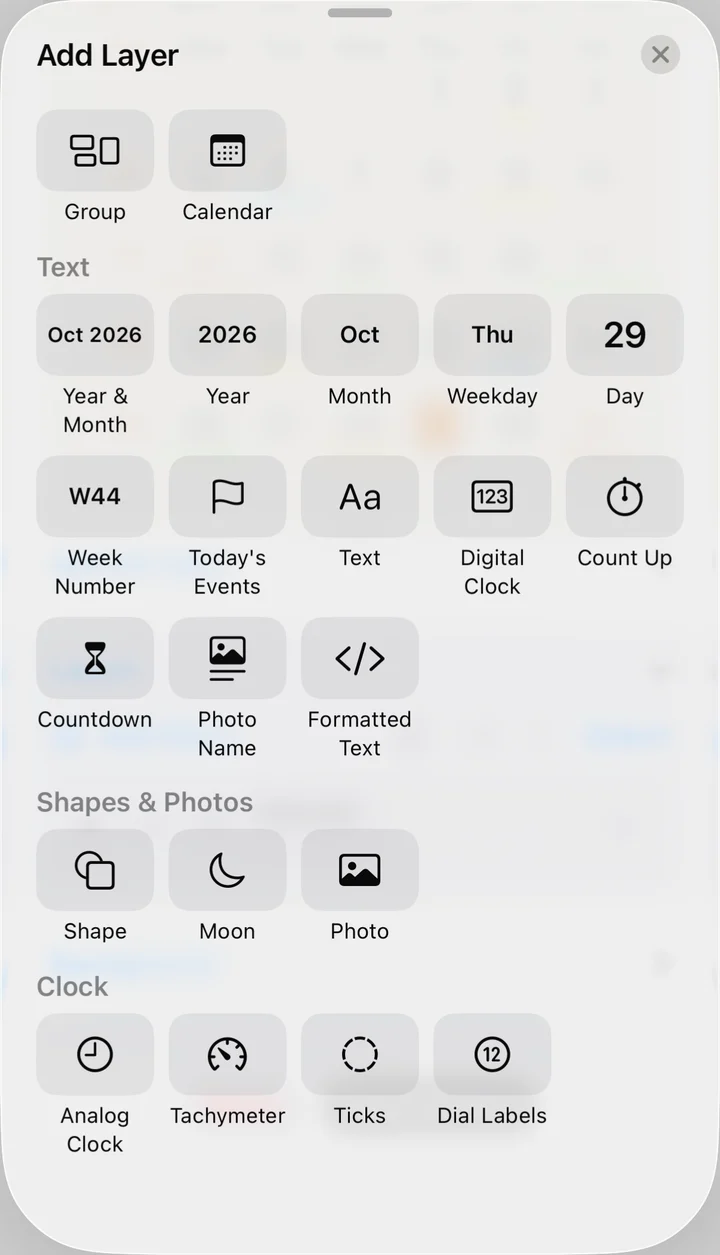
Choose what to add.
Drag it in the preview to move it, and drag the handles to resize or rotate it. Its settings open below.
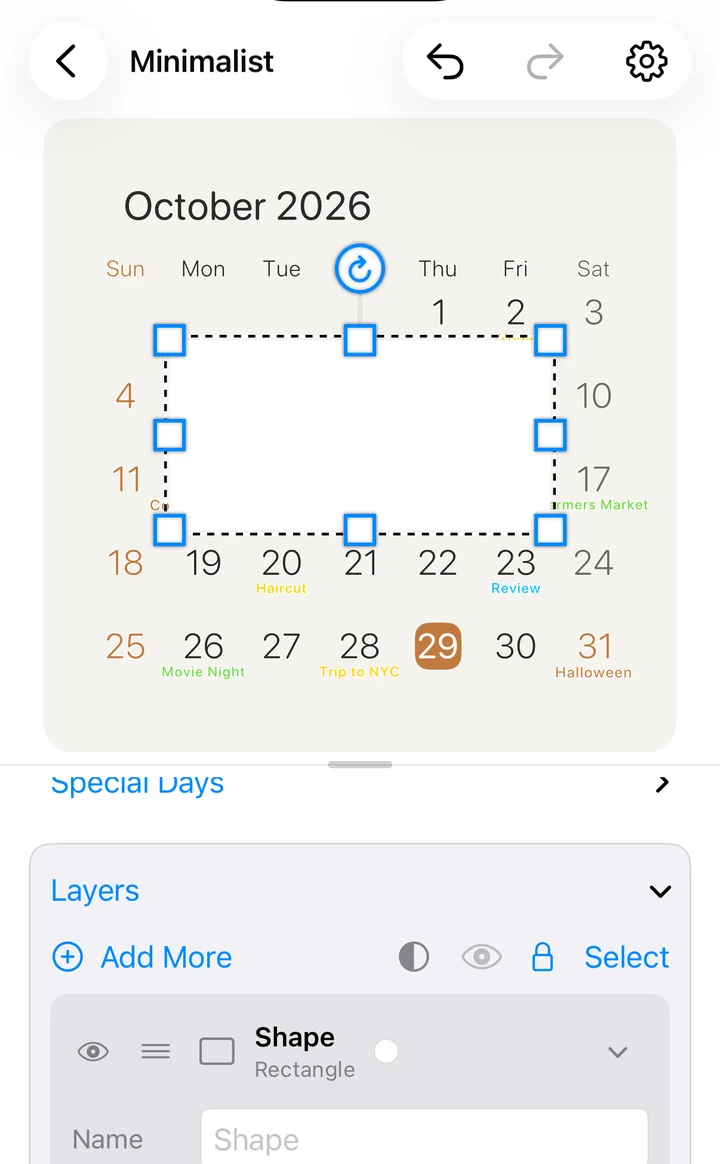
To change the order, drag ≡ in the list. Tap the eye to hide a layer. Touch and hold a part in the preview for copy, paste, lock and more.
Photos and albums
Open Background. Choose Photos lets you pick photos yourself. Photo Album shows the photos of an album in your Photos app, changing them as you choose.
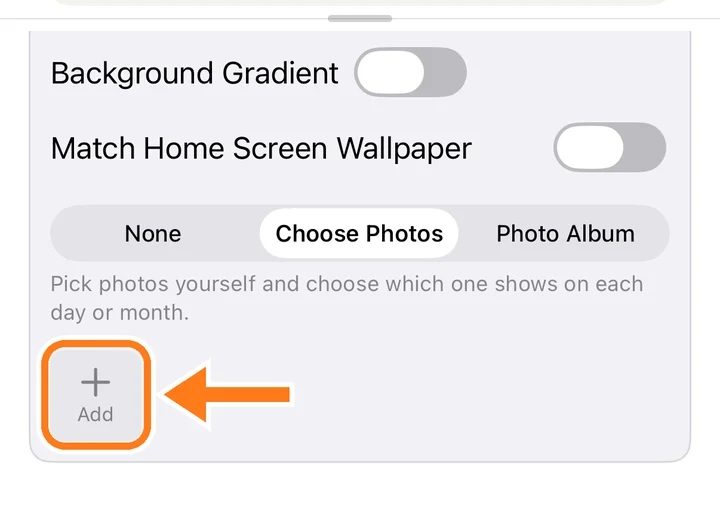
Tap Choose Photos, then tap Add to pick photos.
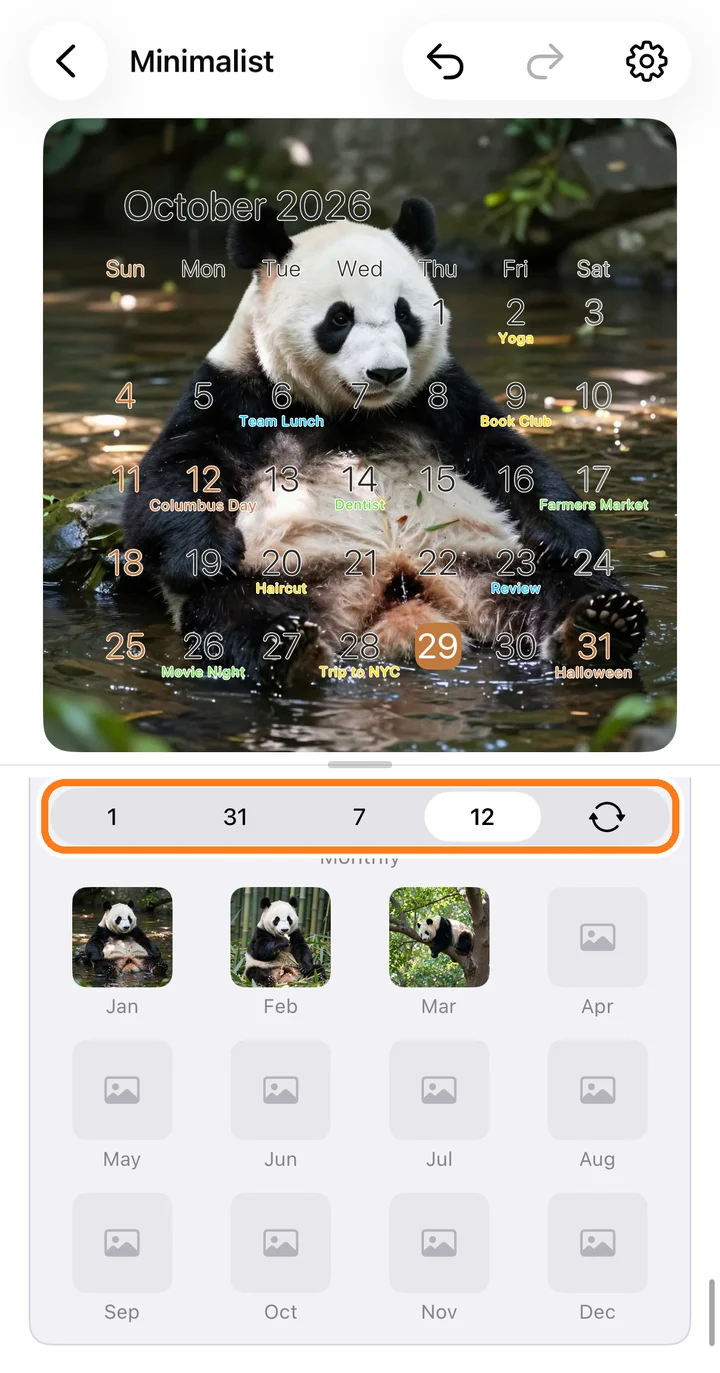
Choose how often the photo changes: one photo (1), each day of the month (31), each weekday (7), each month (12), or one after another (↻). Tap a slot to choose its photo.
Adjust Photo Colors has filters and adjustments for each photo.
Clocks
Open Layers, tap Add More, and choose from Clock. Analog Clock adds a ready-made clock with a face, ticks, numbers and hands, and you can restyle each part.
Under Text, Digital Clock shows the time, and Count Up and Countdown count from or to a date you choose. Choose a city in Digital Clock to make a world clock.
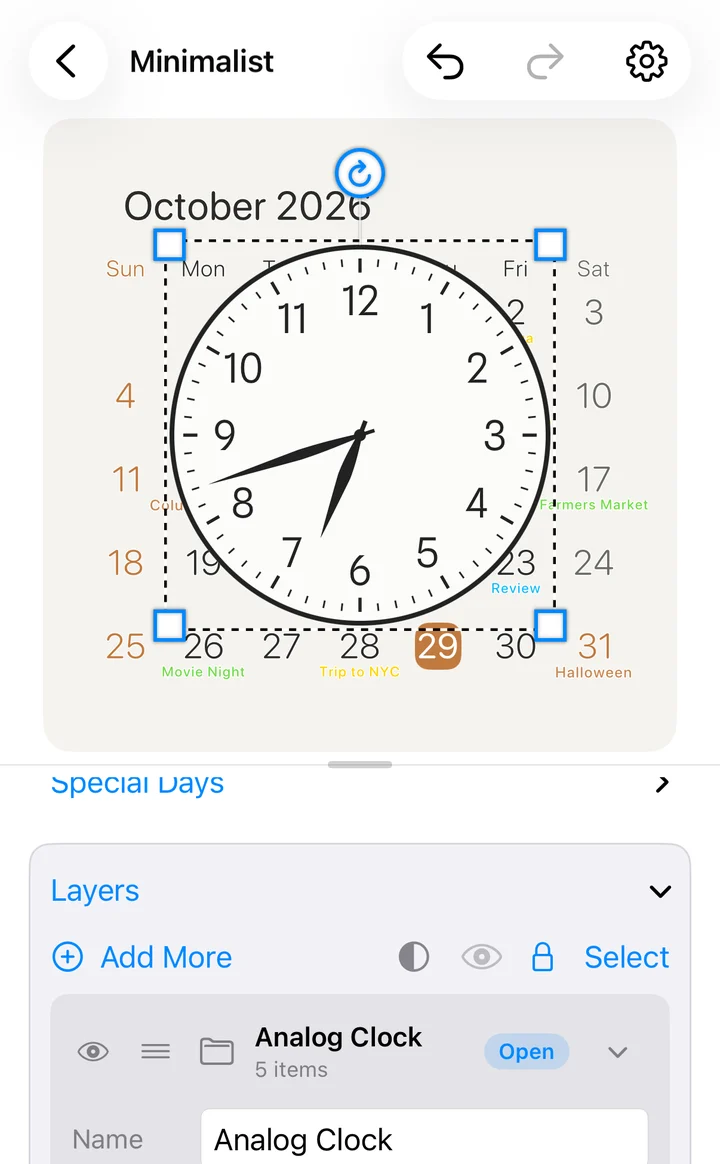
On the widget, the hands move every minute.
Make with AI
Describe the calendar you want, and an AI chat such as ChatGPT, Gemini or Claude designs it for you. A free plan is enough.
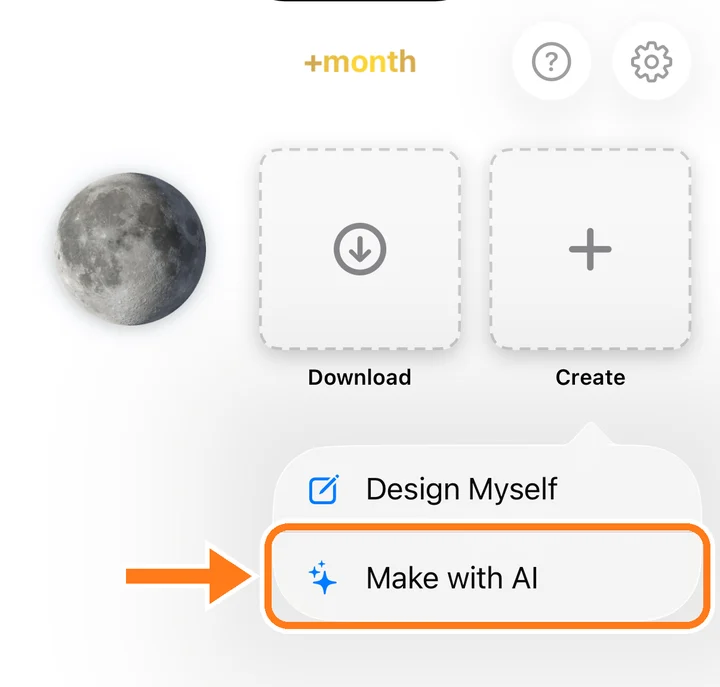
Tap Create and choose Make with AI.
Write what you'd like, or tap an example.
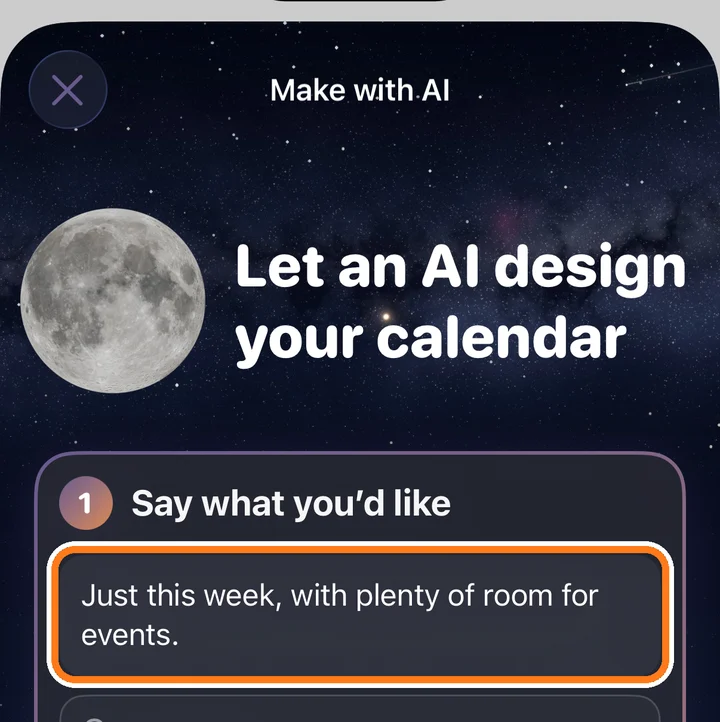
Tap Copy the Prompt for Free Models, then tap ChatGPT, Gemini or Claude. Paste it into the chat and send. If you have a paid plan, Copy the Prompt for Advanced Models gives richer designs.
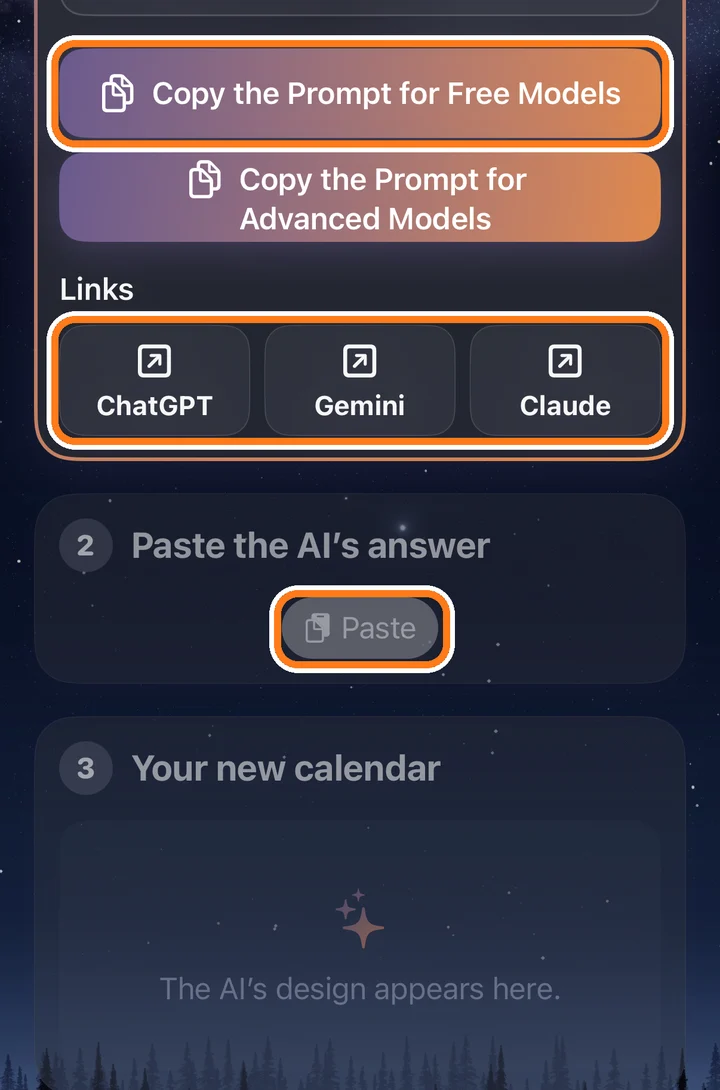
When the AI finishes, copy its whole answer, come back to +month and tap Paste. Your new calendar appears. Tap Save This Design to keep it.
To change something, write it under Ask the AI for More and send the new prompt the same way.
Formatted text
For full control over text, choose Formatted Text in Add Layer. Write the date and events with simple tags, and style each part on its own.
For example, this shows the weekday, a big bold date, and the month and year below it:
<weekday size="55" tracking="20"/>
<day size="300" weight="bold"/>
<month size="55"/> <year size="55"/>
Tap Tags & Samples on the layer to see every tag, with examples you can copy.
Check your design
Tap ⚙ at the top right of the editor.
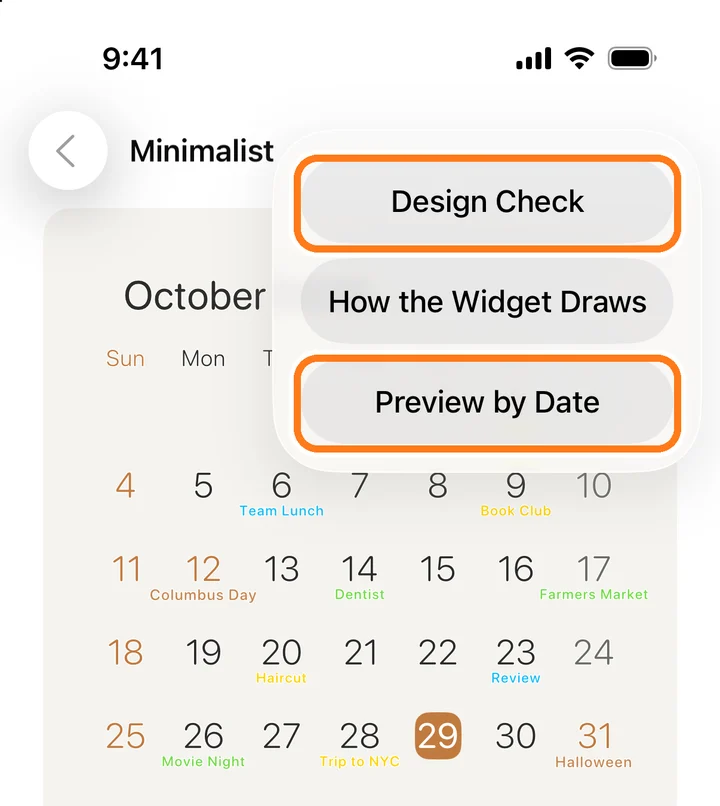
Design Check shows your calendar in situations where designs often break, such as the longest month name, six-week months, busy days and other languages. Preview by Date shows how it looks at any date and time you choose.
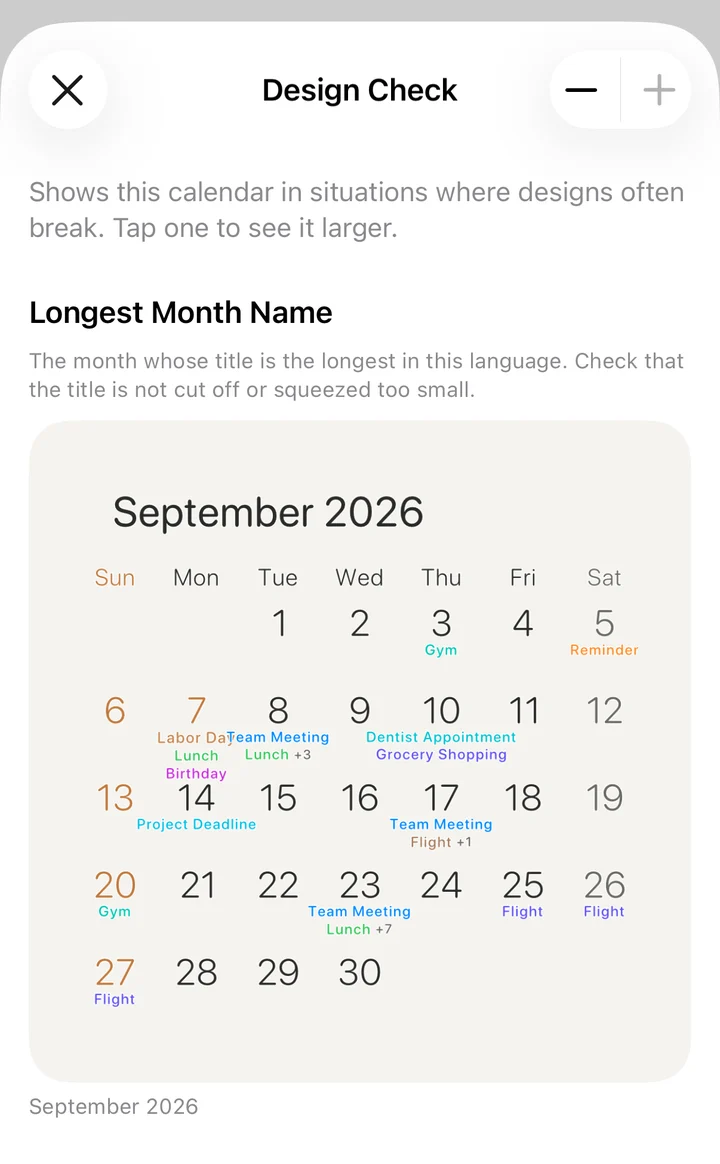
4More
Sharing, other devices and Premium.
Share a calendar
Send a calendar you made to a friend as a file.
Tap the calendar, tap ⋯ at the top right, and choose Share.
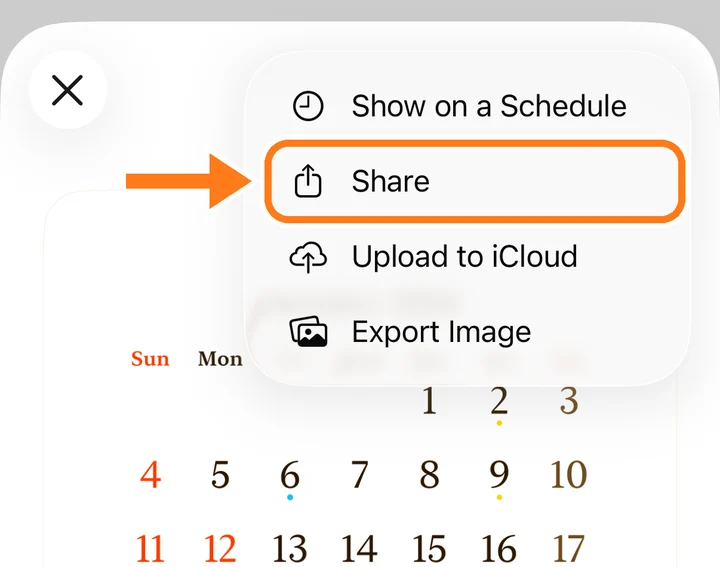
Choose how to send it, such as Messages, Mail or AirDrop.
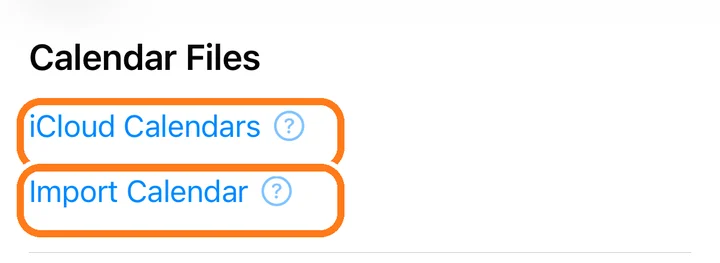
When your friend opens the file, +month adds it to their calendars. They can also choose Import Calendar in Settings.
Use your calendars on other devices
Move calendars between your iPhone, iPad and Mac signed in to the same Apple Account.
Tap the calendar, tap ⋯ at the top right, and choose Upload to iCloud.
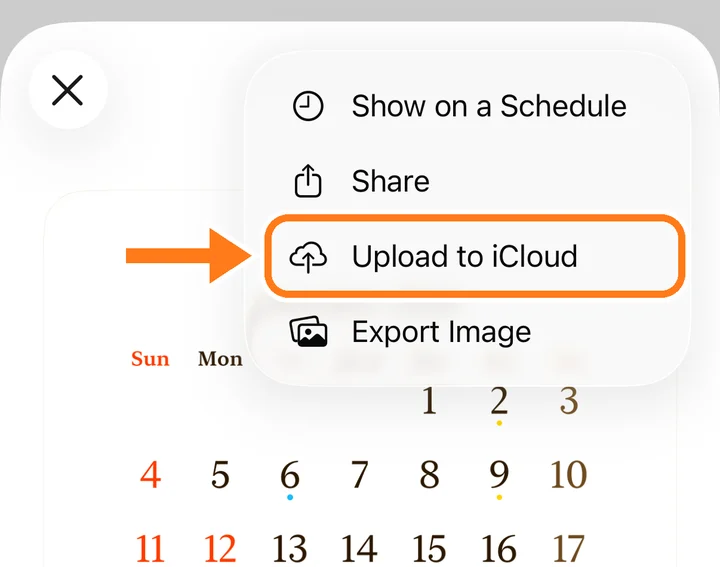
On the other device, open Settings in +month and tap iCloud Calendars. Tap a calendar to add it.
iCloud Drive needs to be on. Deleting a calendar from iCloud doesn't remove copies already added to your devices.
Export as an image
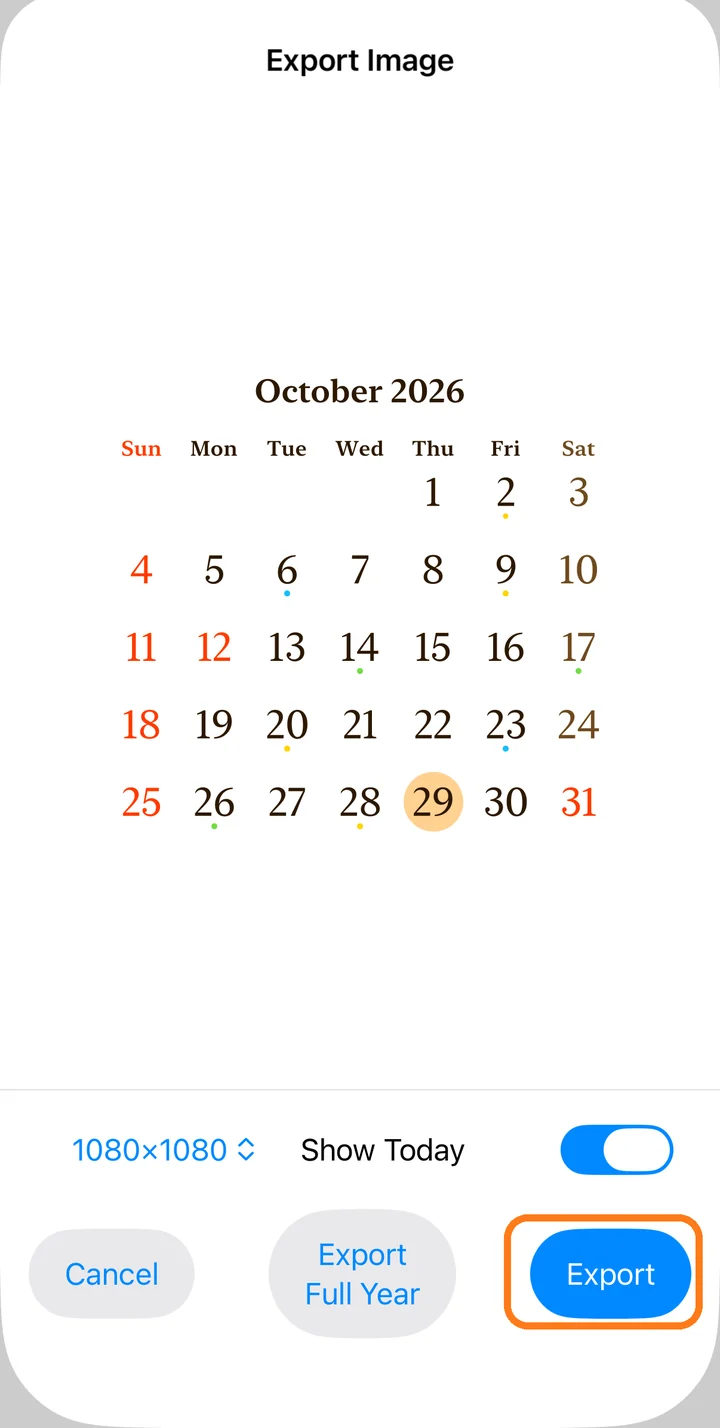
Tap the calendar, tap ⋯ at the top right, and choose Export Image. Choose 1080×1080 or 2048×2048, then tap Export to save it to Photos.
Export Full Year saves every month of this year. Turn off Show Today to leave out today's mark.
+month Premium
With +month Premium, there are no ads, you can download as many calendars as you like, and there's no daily save limit on Mac.
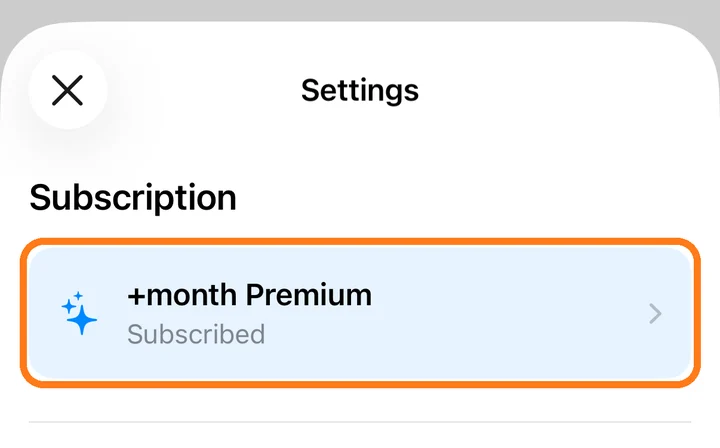
Subscribe in Settings under +month Premium. One subscription works on your iPhone, iPad and Mac.
Calendars you downloaded stay yours, even if you cancel.